Import virtual machine to AWS
In this step, you will create a role named vmimport and import the virtual machine that was uploaded to the S3 Bucket in the previous step into an AMI. The entire process will be handled with the AWS CLI.
Create vmimport role
Before performing the Import of virtual machines into AWS. You need to check the role required for this implementation.
- Access the IAM Management console.
- In the navigation bar, select Roles
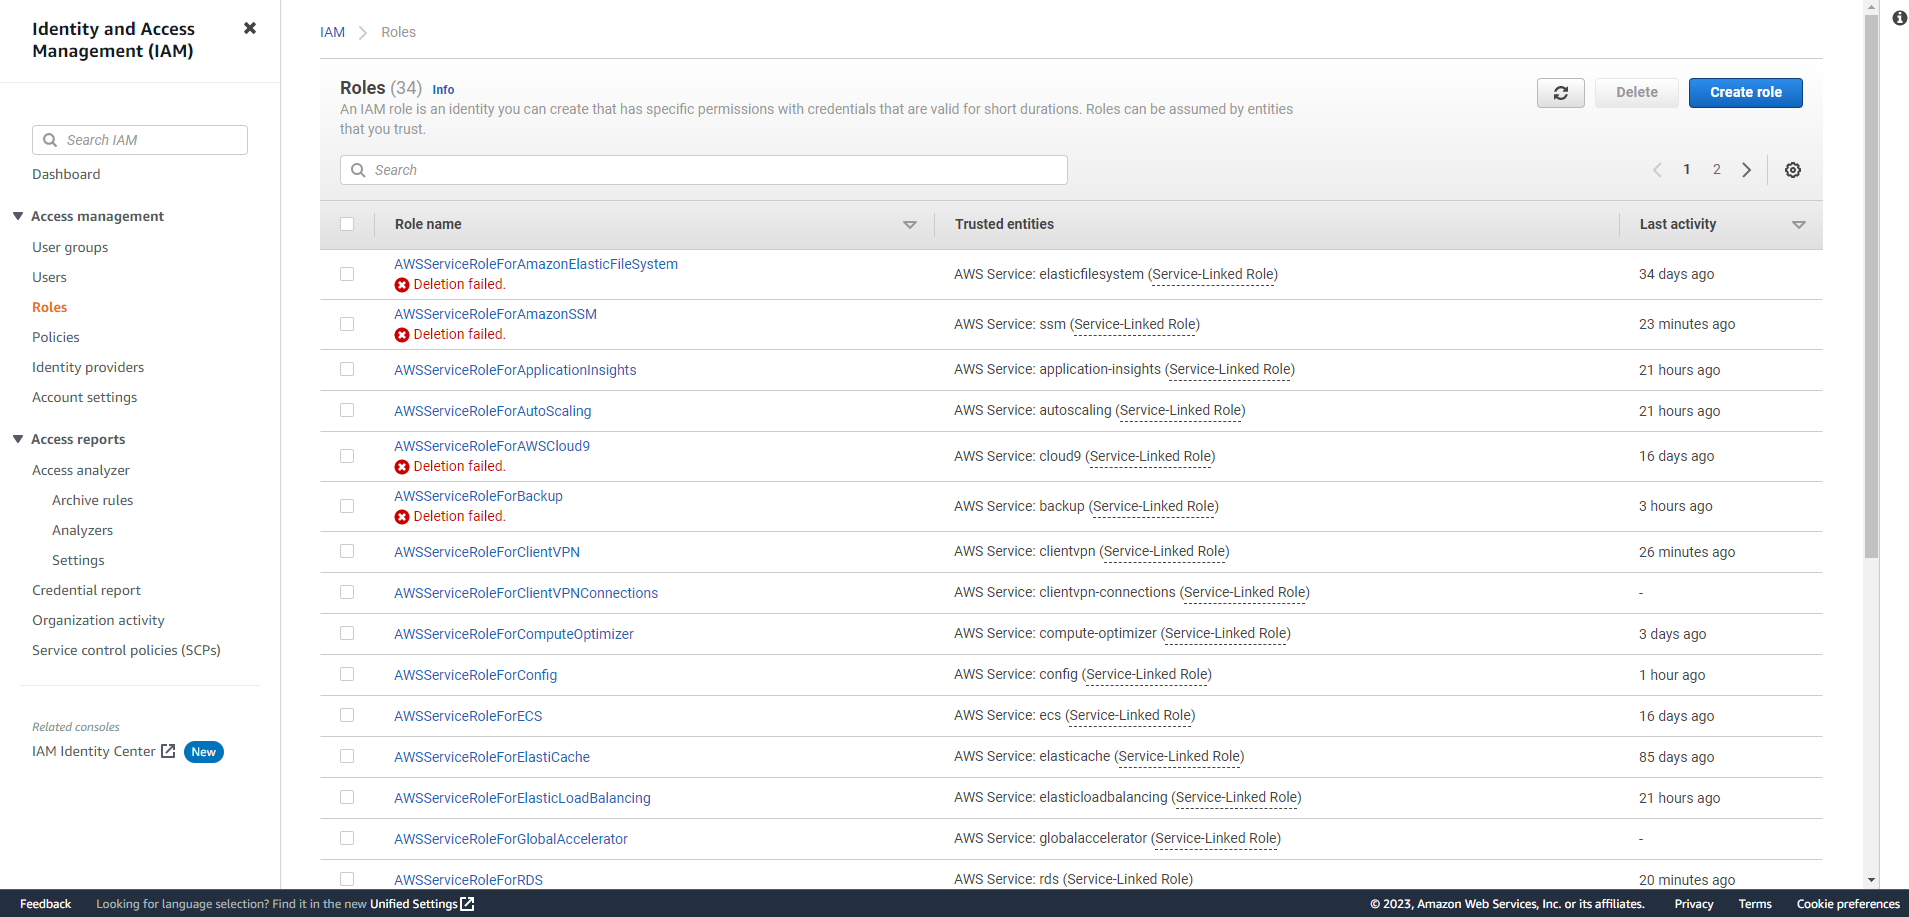
- If you do not see the vmimport role, proceed to create the vmimport role.
- Create a file named trust-policy.json to allow the VM Import/Export service to accept your upcoming vmimport role.
{
   "Version": "2012-10-17",
   "Statement": [
      {
         "Effect": "Allow",
         "Principal": { "Service": "vmie.amazonaws.com" },
         "Action": "sts:AssumeRole",
         "Condition": {
            "StringEquals":{
               "sts:Externalid": "vmimport"
            }
         }
      }
   ]
}
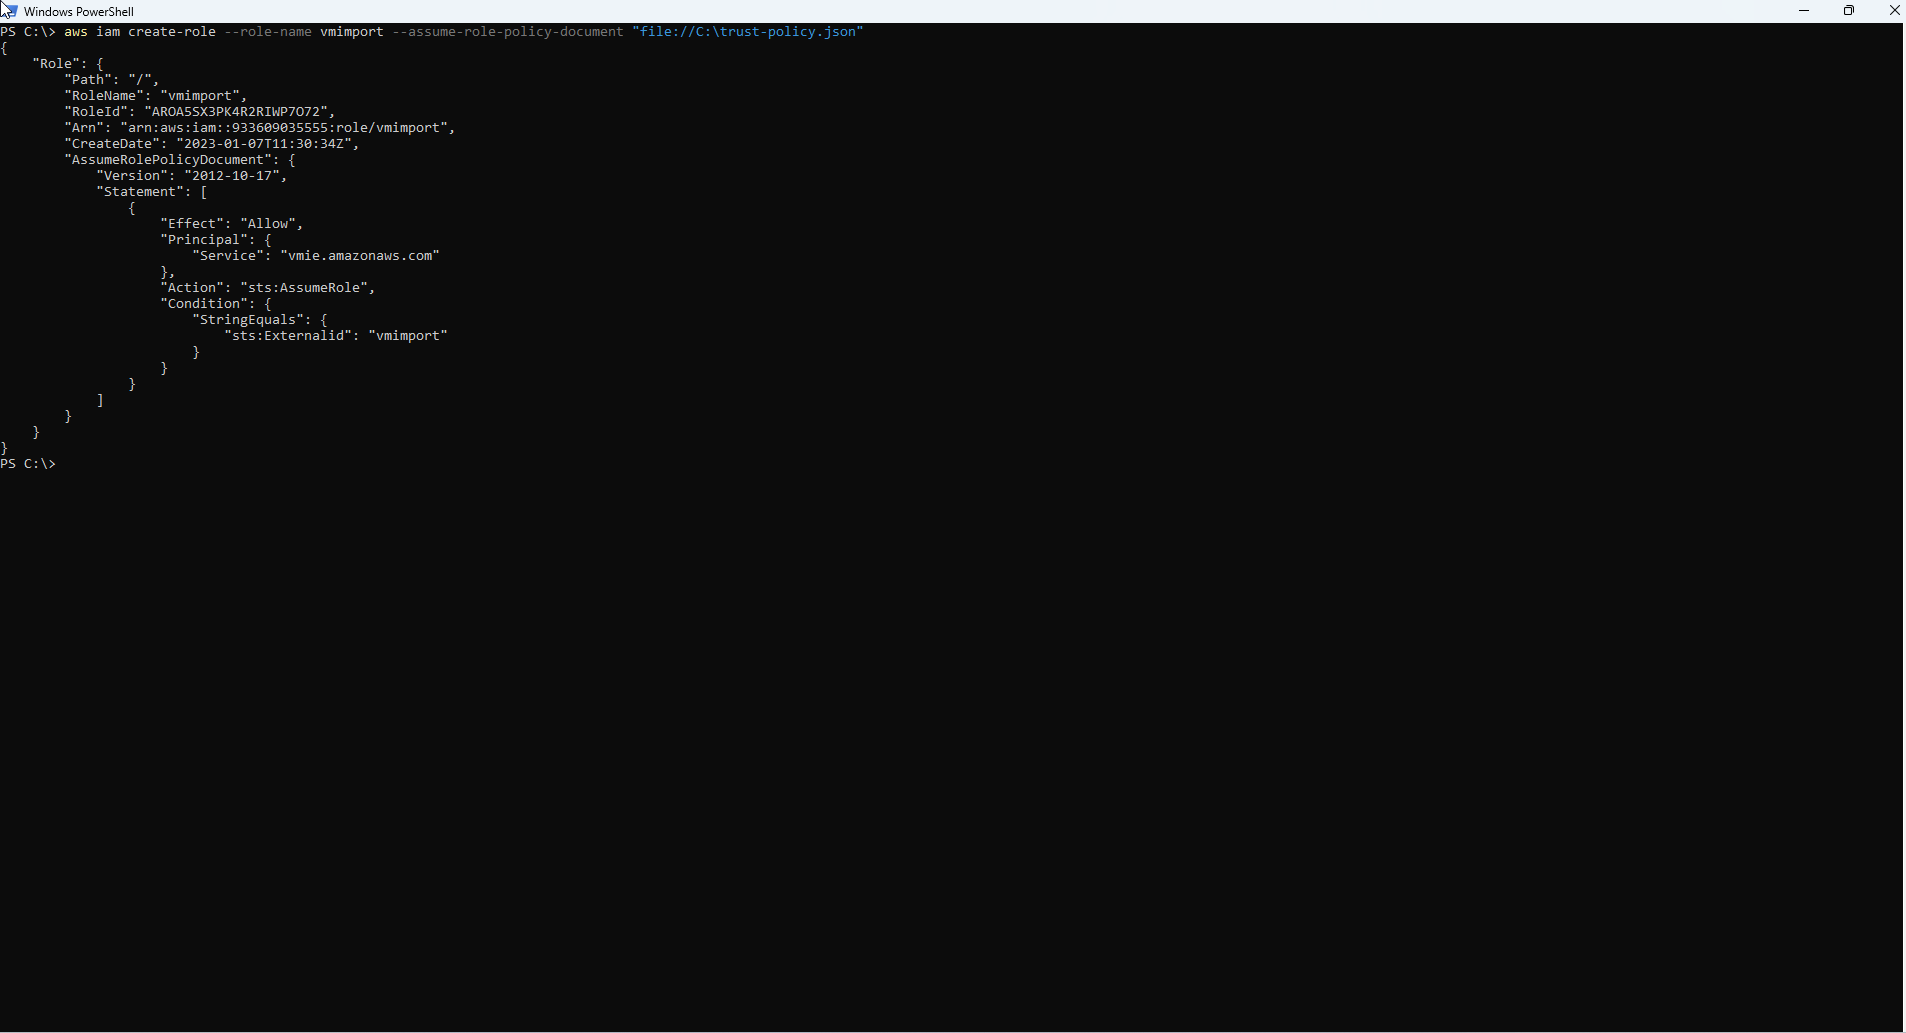
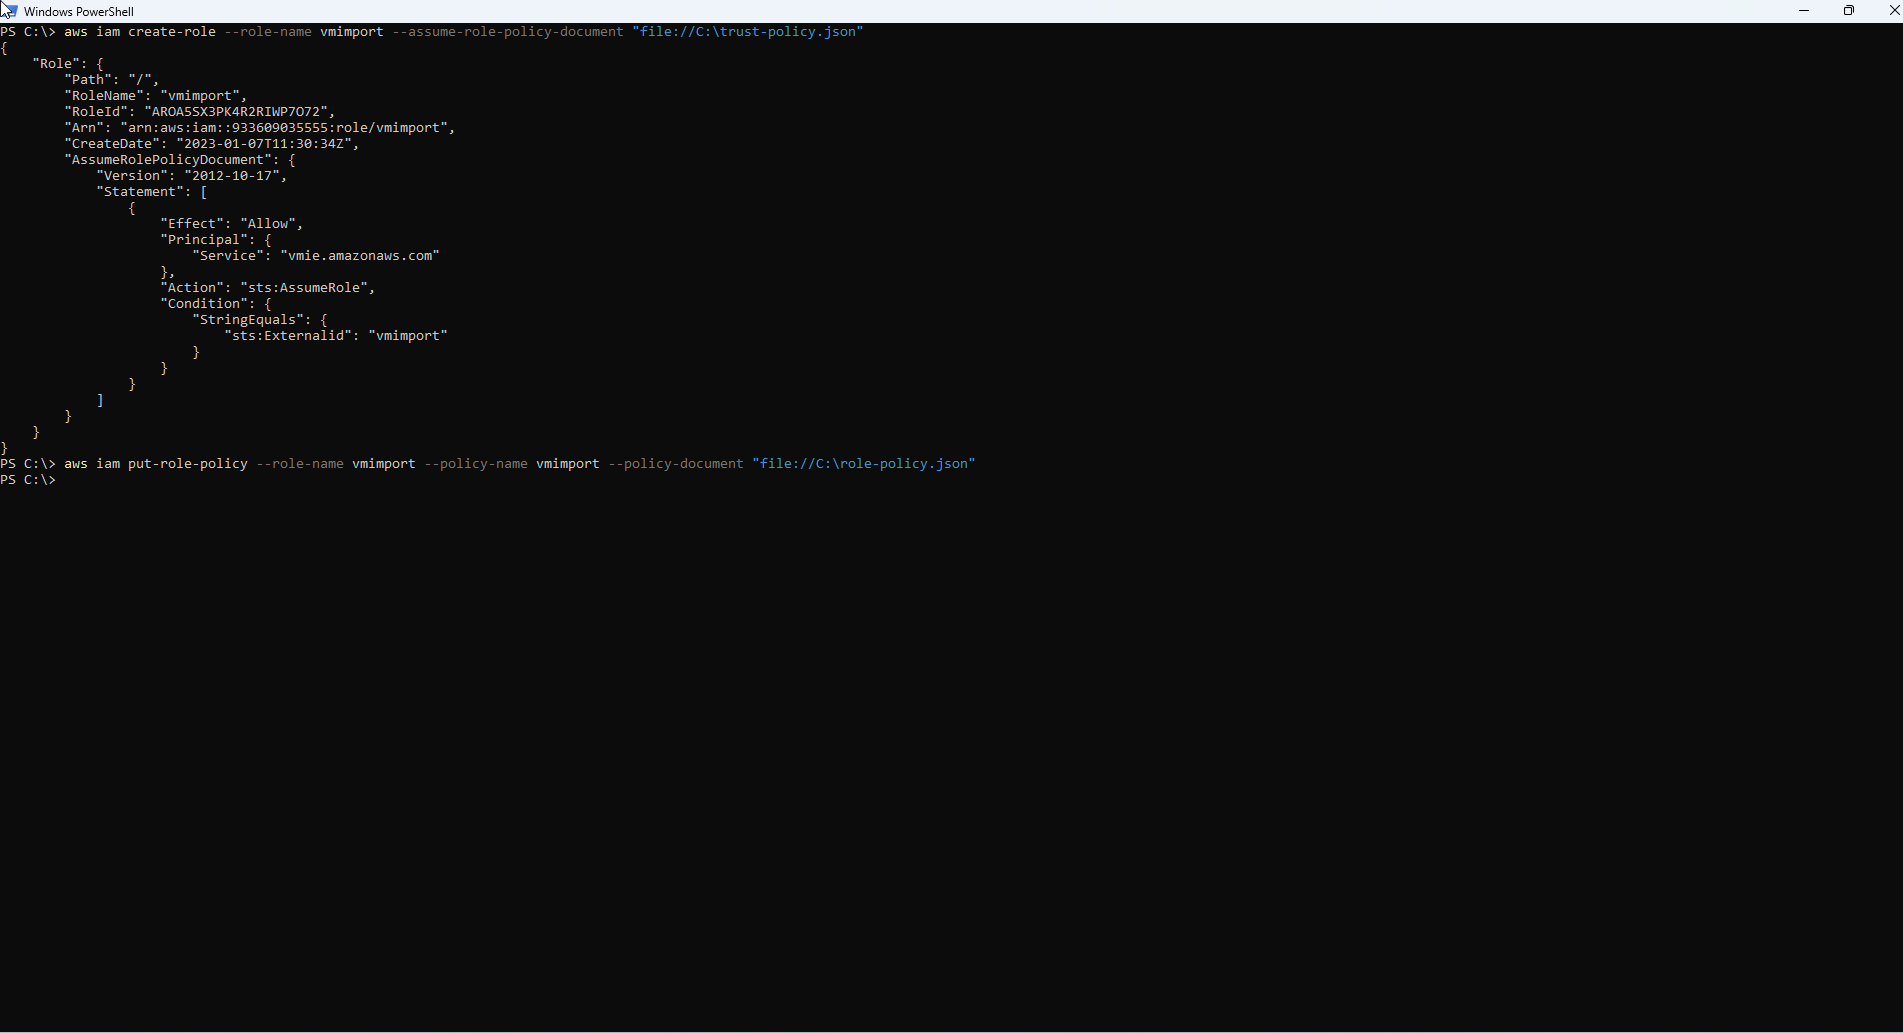
- Use the create-role command to create an IAM role named vmimport and assign trust-policy.jjson to the parameter
--assume-role-policy-document
# replace "E:\trust-policy.json" with the path to the trust-policy.json file on your environment
aws iam create-role --role-name vmimport --assume-role-policy-document "file://E:\trust-policy.json"
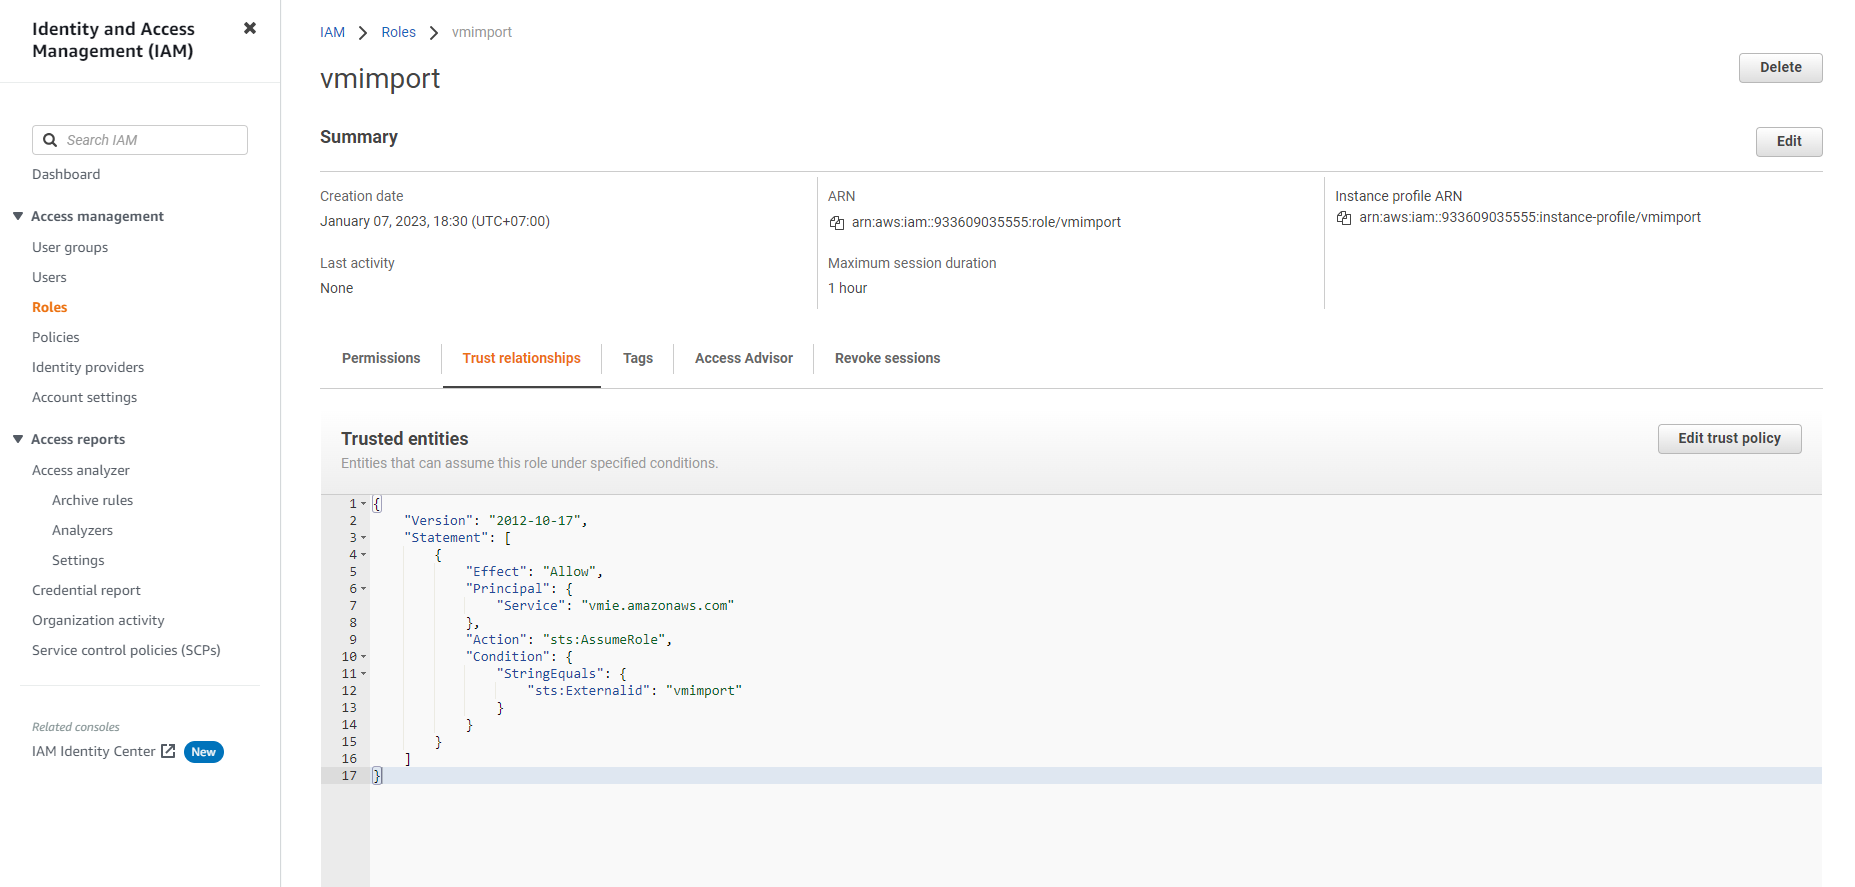
- Check the created role.

- See Trust relationships
- Create a file role-policy.json containing the following policies to allow the IAM role to access buckets containing virtual machines to exercise the permissions in the “Action” section:. Inside:
- disk-image-file-bucket is the name of the S3 bucket used to store the exported files from onpremise (import-bucket-2023 in this example).
- export-bucket is the name of the S3 bucket used to export the ec2 instance that will be used for the Export VM from AWS later.
{
   "Version":"2012-10-17",
   "Statement":[
      {
         "Effect": "Allow",
         "Action": [
            "s3:GetBucketLocation",
            "s3:GetObject",
            "s3:ListBucket"
         ],
         "Resource": [
            "arn:aws:s3:::disk-image-file-bucket",
            "arn:aws:s3:::disk-image-file-bucket/*"
         ]
      },
      {
         "Effect": "Allow",
         "Action": [
            "s3:GetBucketLocation",
            "s3:GetObject",
            "s3:ListBucket",
            "s3:PutObject",
            "s3:GetBucketAcl"
         ],
         "Resource": [
            "arn:aws:s3:::export-bucket",
            "arn:aws:s3:::export-bucket/*"
         ]
      },
      {
         "Effect": "Allow",
         "Action": [
            "ec2:ModifySnapshotAttribute",
            "ec2:CopySnapshot",
            "ec2:RegisterImage",
            "ec2:Describe*"
         ],
         "Resource": "*"
      }
   ]
}
- Use the following command to assign the roles described in the role-policy.json file to the created vmimport role
aws iam put-role-policy --role-name vmimport --policy-name vmimport --policy-document "file://E:\role-policy.json"
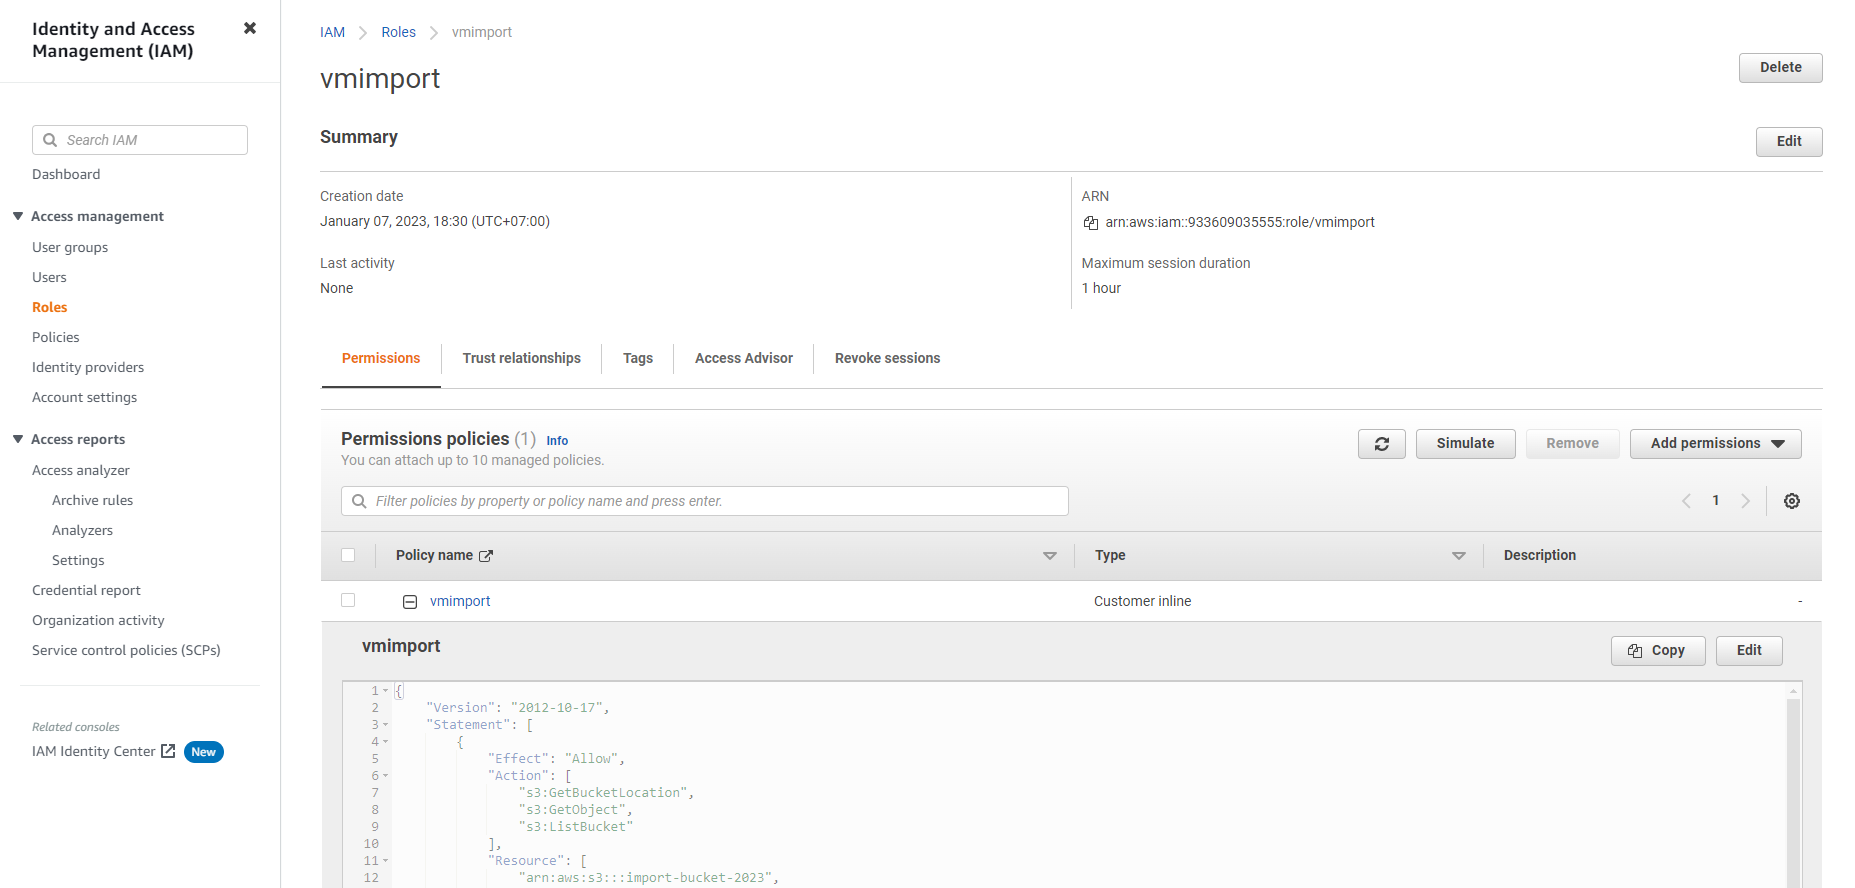
- Check permissions. You can also check to see if the vmimport role has been successfully created by going to the IAM Management Console and selecting the role. You can also edit the role policy directly by selecting Edit policy.
Import virtual machine to AMI
We will use the AWS CLI to launch the Import virtual machine to AMI process.
For On-premise virtual machines, make sure you are not using UEFI boot for the virtual machine. UEFI boot is not supported on AWS. The conversion will fail and an error ClientError: EFI partition detected will appear. UEFI booting is not supported in EC2.
For Linux VMs, check for the latest kernel version supported by AWS. Newer kernels that support AWS won’t do it. Operating System Requirements can be found at Operating System Requirements
- In Terminal on Linux (or Command Prompt/Power Shell on Windows), run the command aws ec2 import-image to start importing the exported virtual machine and convert it to AMI. The following settings are relevant:
- –deescription: Set description for AMI
- –disk-ccontainers: Contains information identifying virtual machine files such as:
- Format format (eg: vhdx or vmdk)
- Storage bucket (eg import-bucket-2023)
- File path (e.g. Ubuntu.vhdx or Ubuntu-disk1.vmdk)
aws ec2 import-image --description "VM Image" --disk-containers Format=vhdx,UserBucket="{S3Bucket=import-bucket-2021,S3Key=Ubuntu.vhdx}"

If when running the command you get the error An error occurred (InvalidParameter) when calling the ImportImage operation: The service role vmimport provided does not exist or does not have sufficient permissions, check the step of creating the vmimport role and make sure the role has been created and set up enough permissions.
- It will take 5-10 minutes depending on the size of the virtual machine for AWS to convert the virtual machine into an AMI.
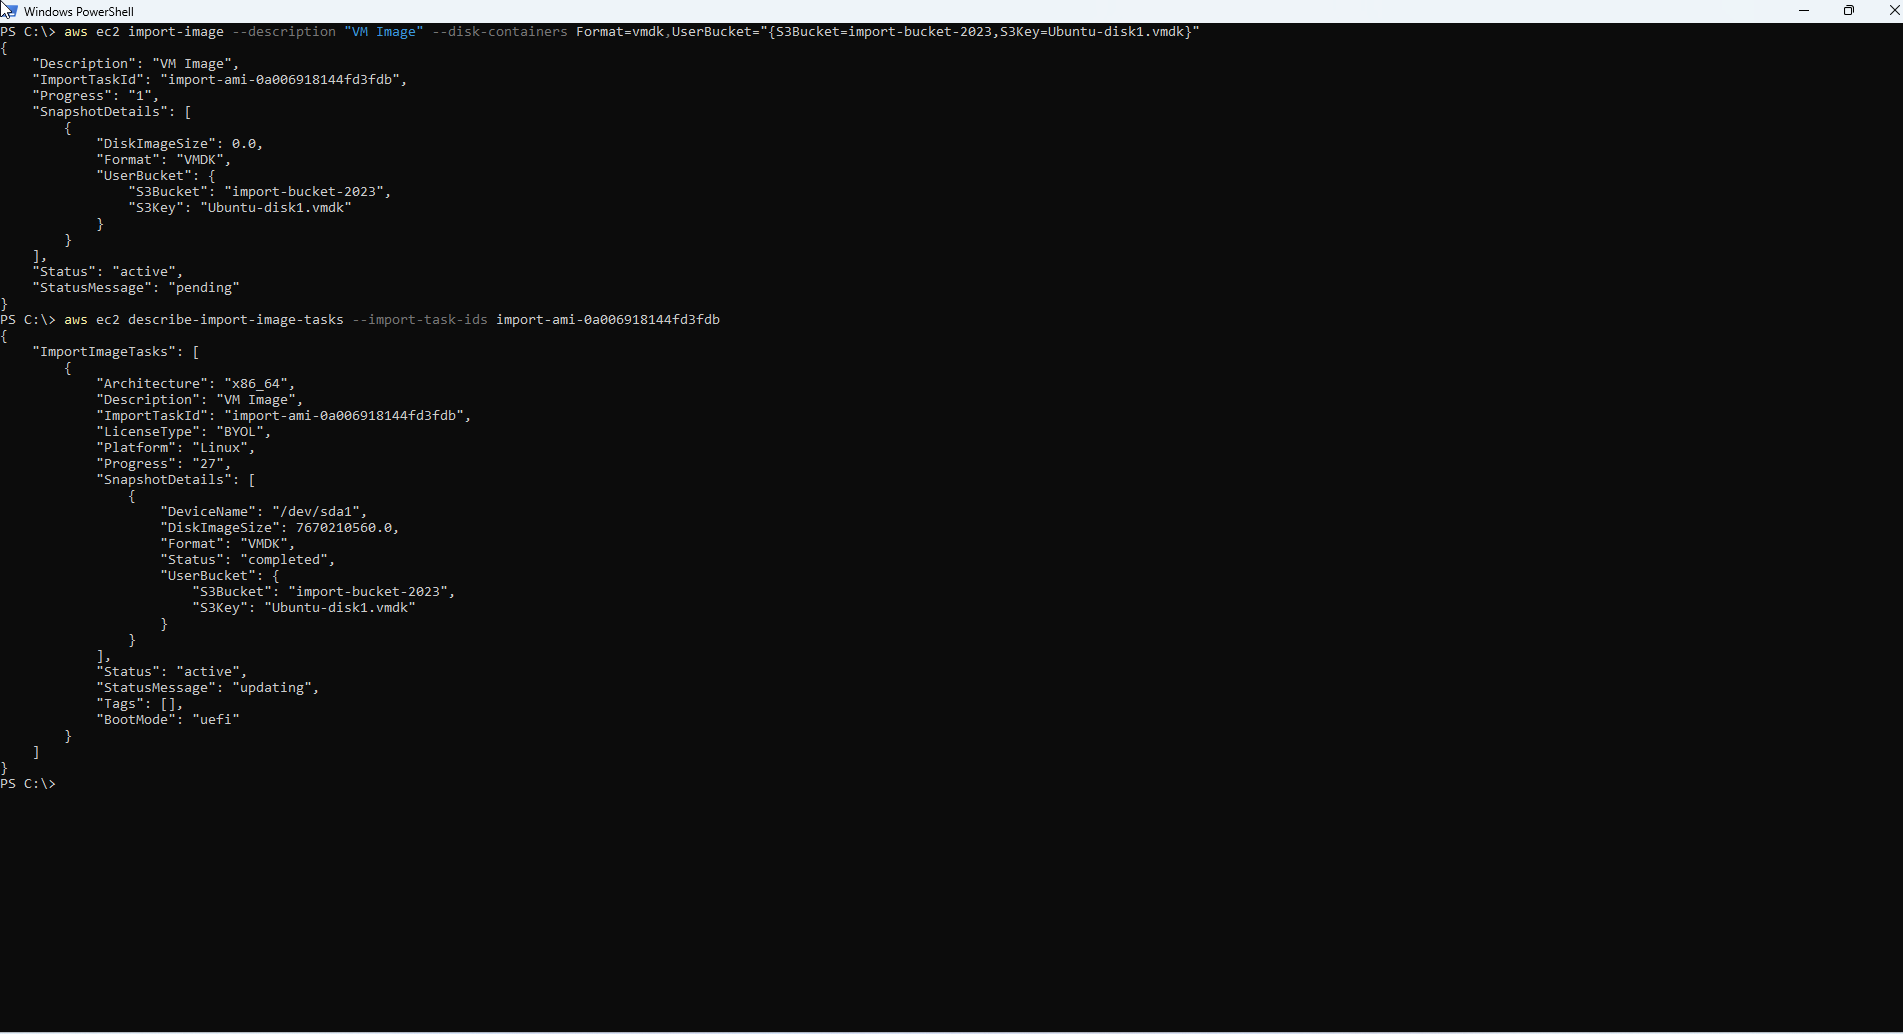

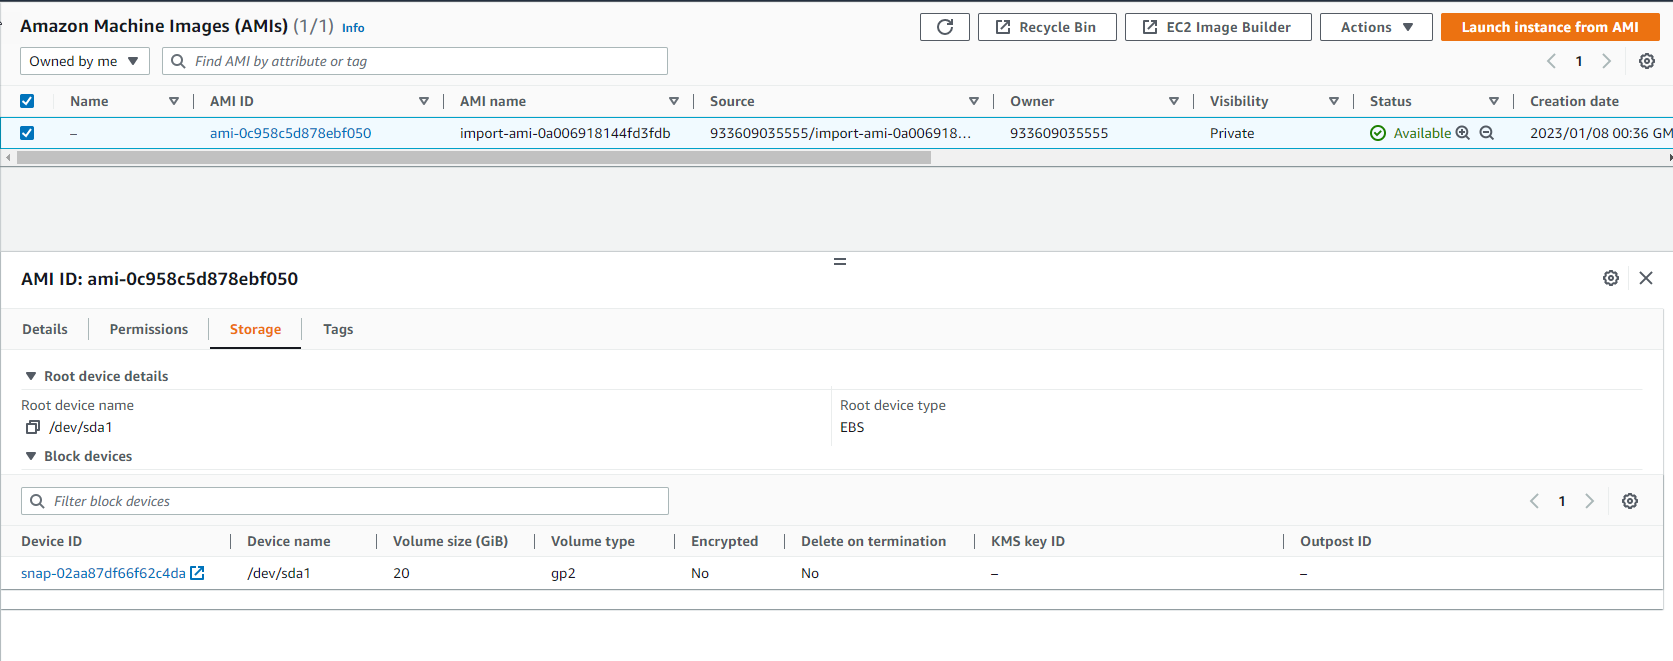
- Once completed, we will see in the AMI list there will be one more AMI with the AMI name being the task id we created above.
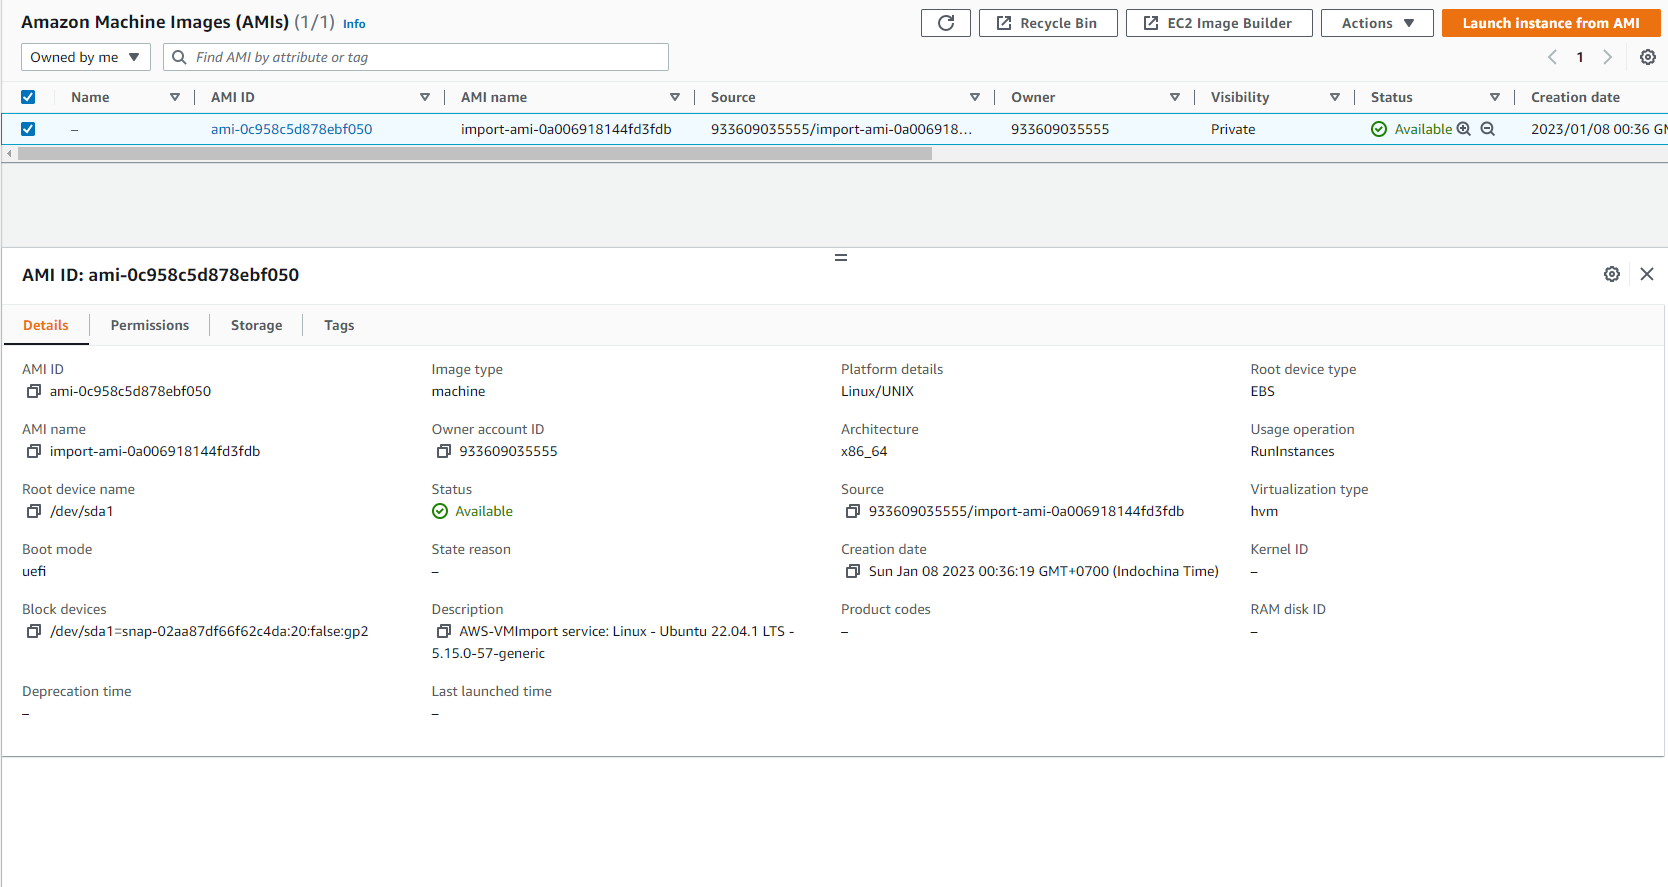
- You must check that EBS is not Encrypted