Upload virtual machine to AWS
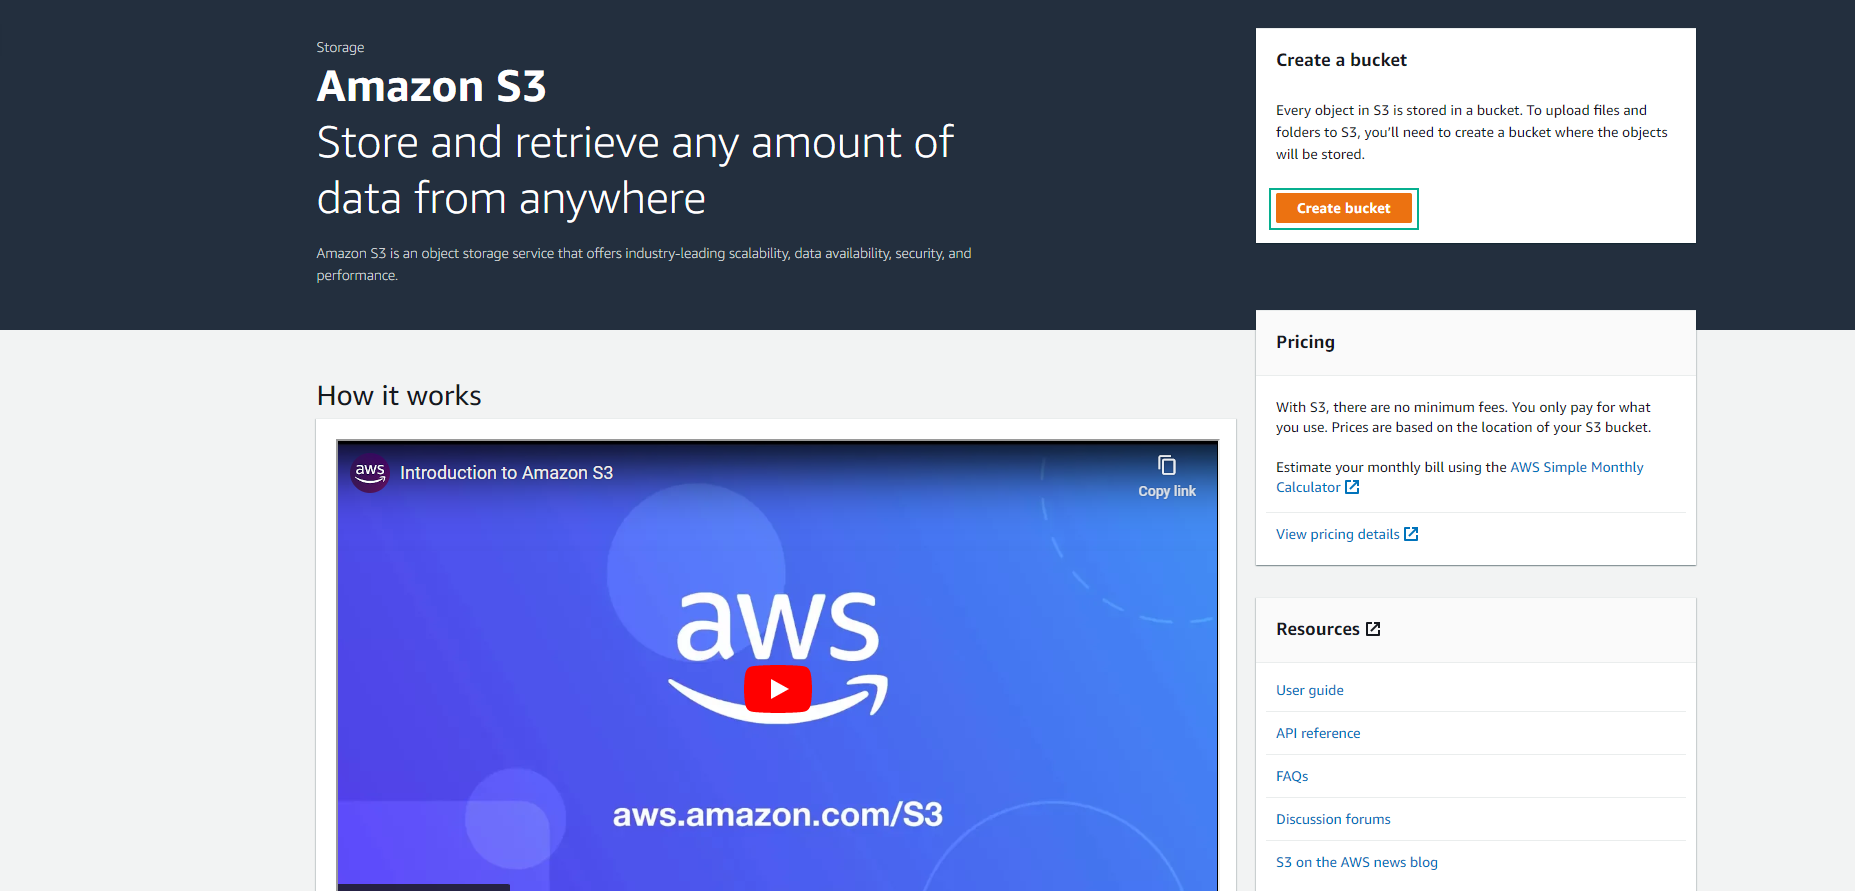
Storing Virtual Machine Files in Amazon S3
In this step, we will use Amazon S3 to store the virtual machine file that has been exported from the virtualized environment.
Note: The name of the S3 Bucket must be unique and cannot match any existing names.
Create S3 Bucket to Store Virtual Machines
To create an S3 bucket, follow these steps:
-
Access the Amazon S3 Management console:
- In the navigation bar, select Buckets.
- Click on Create bucket to create a new S3 bucket.
-
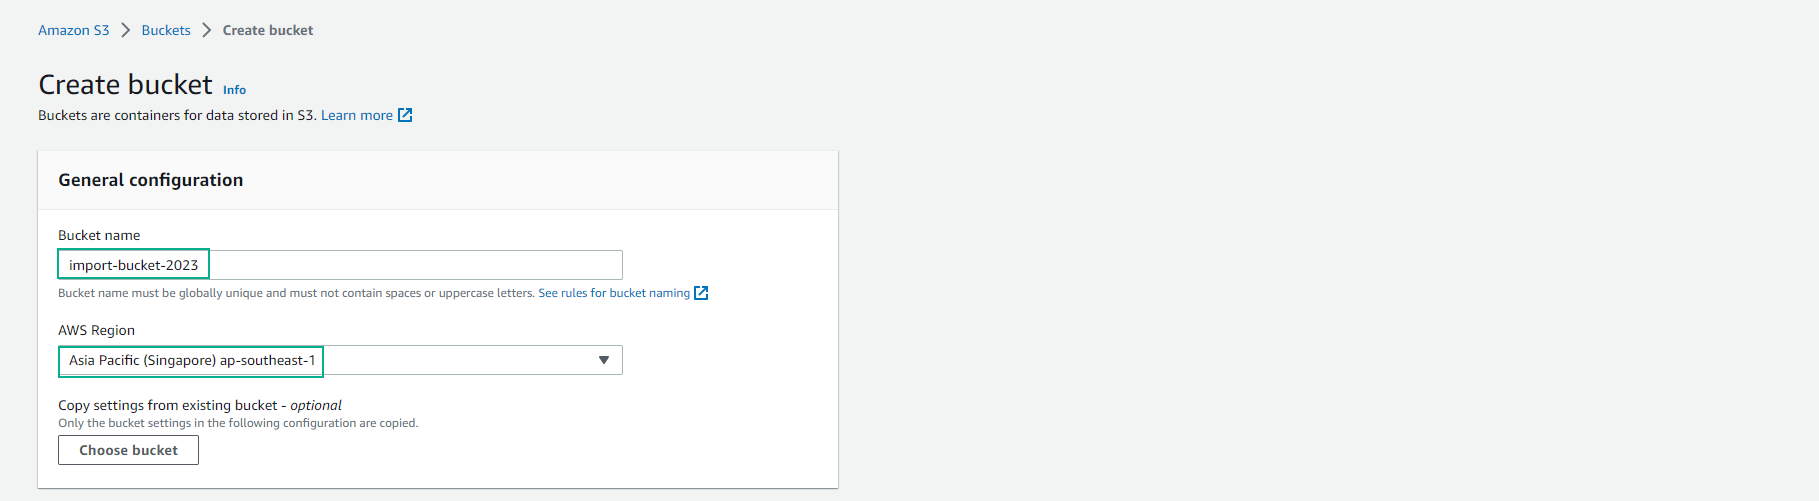
On the Create bucket page, set the parameters for the S3 bucket:
- Bucket name: Enter a unique bucket name (e.g., import-bucket-2023).
- Region: Select the storage region of the bucket.
-
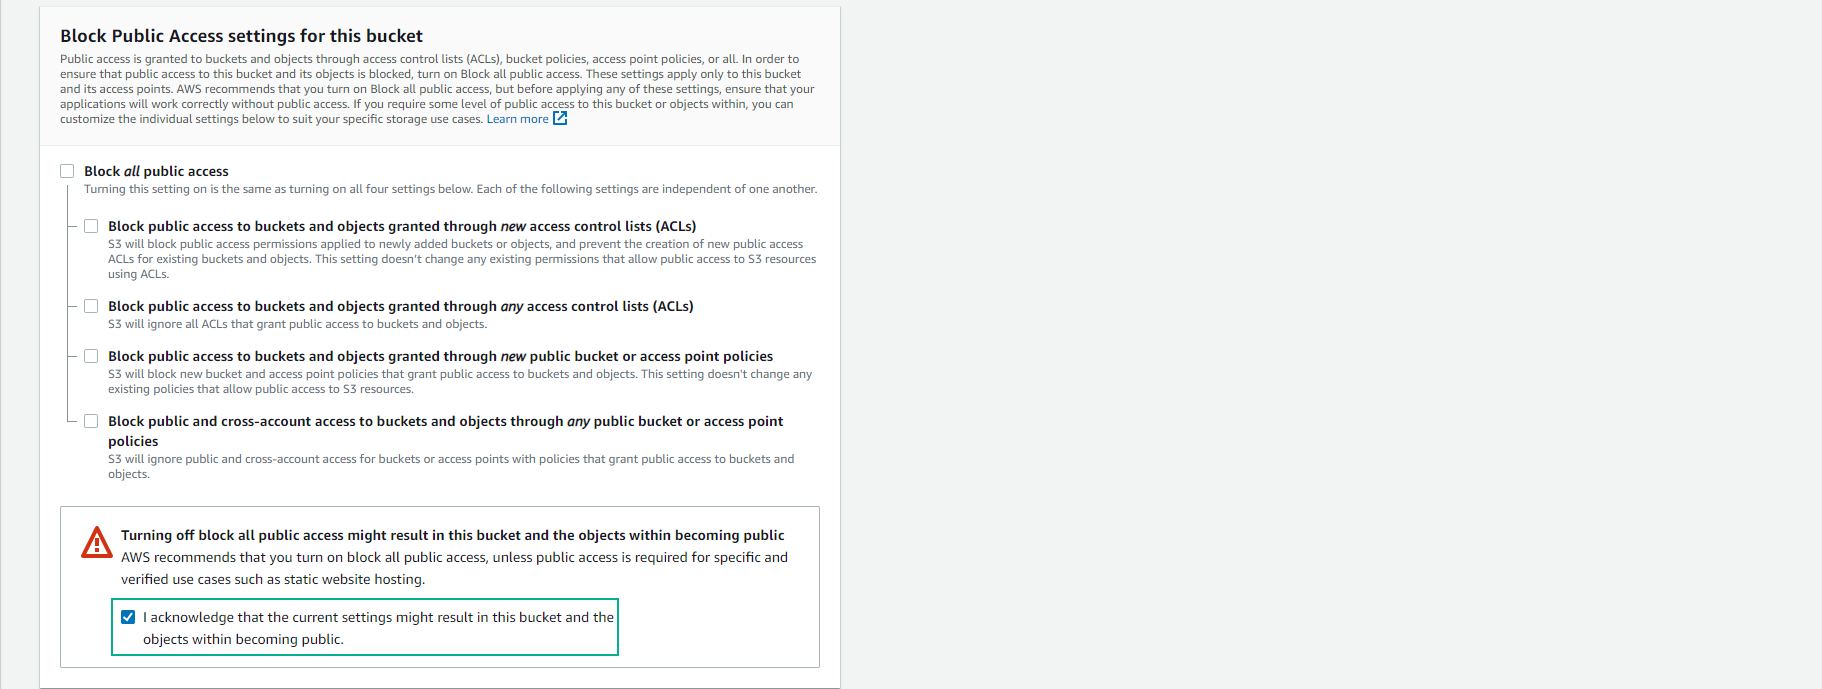
Uncheck Block all public access to allow public access. AWS will issue a warning; acknowledge it by selecting I acknowledge that the current settings might result in this bucket and the objects within becoming public.
-
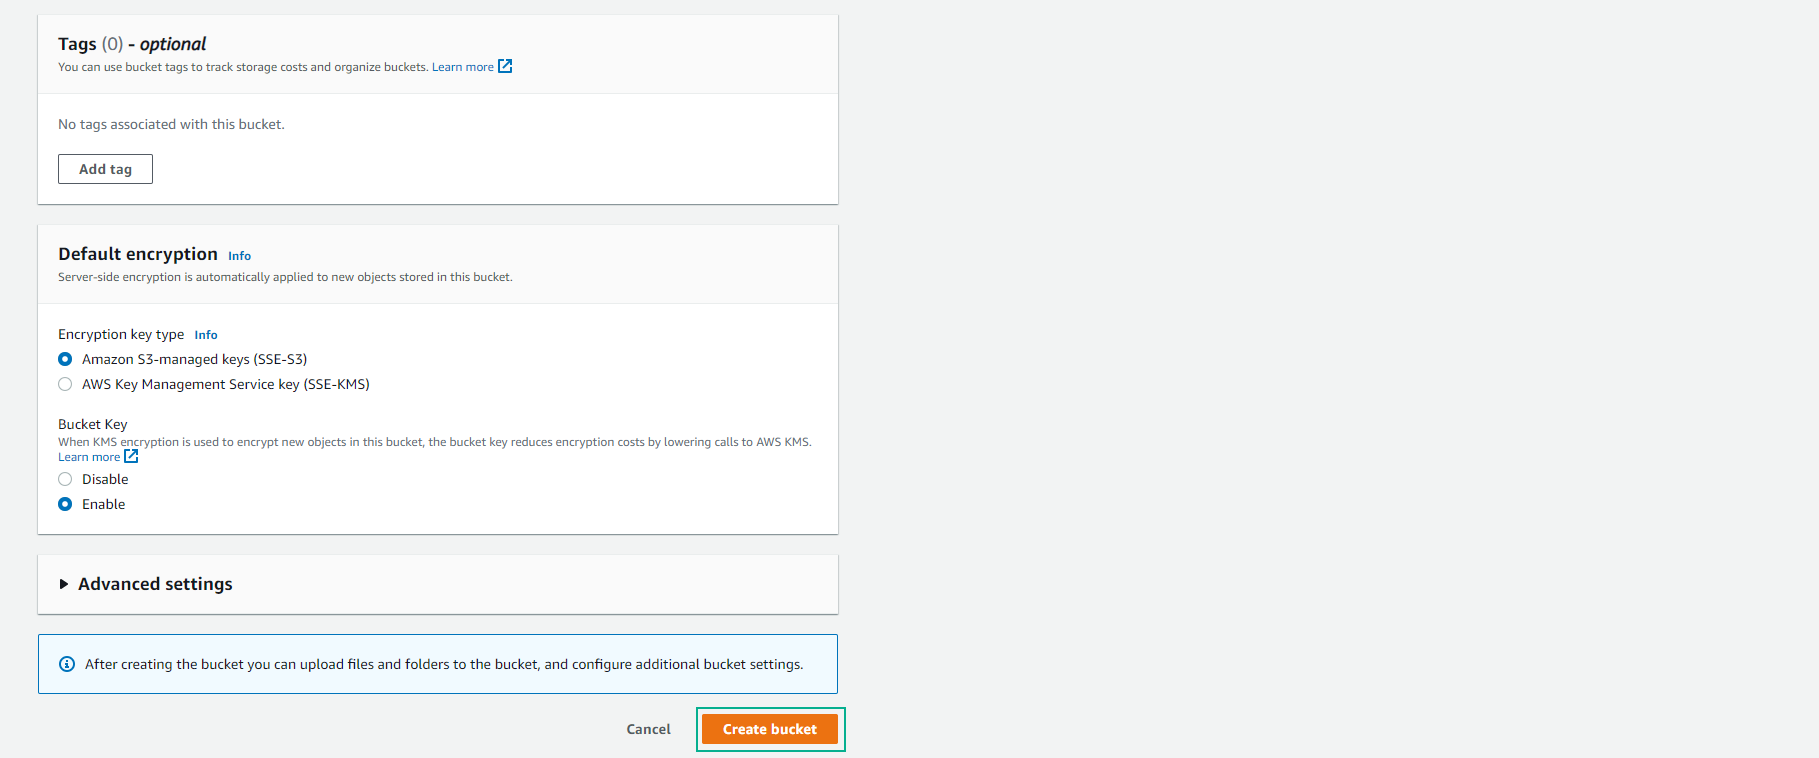
Select Create bucket.
-
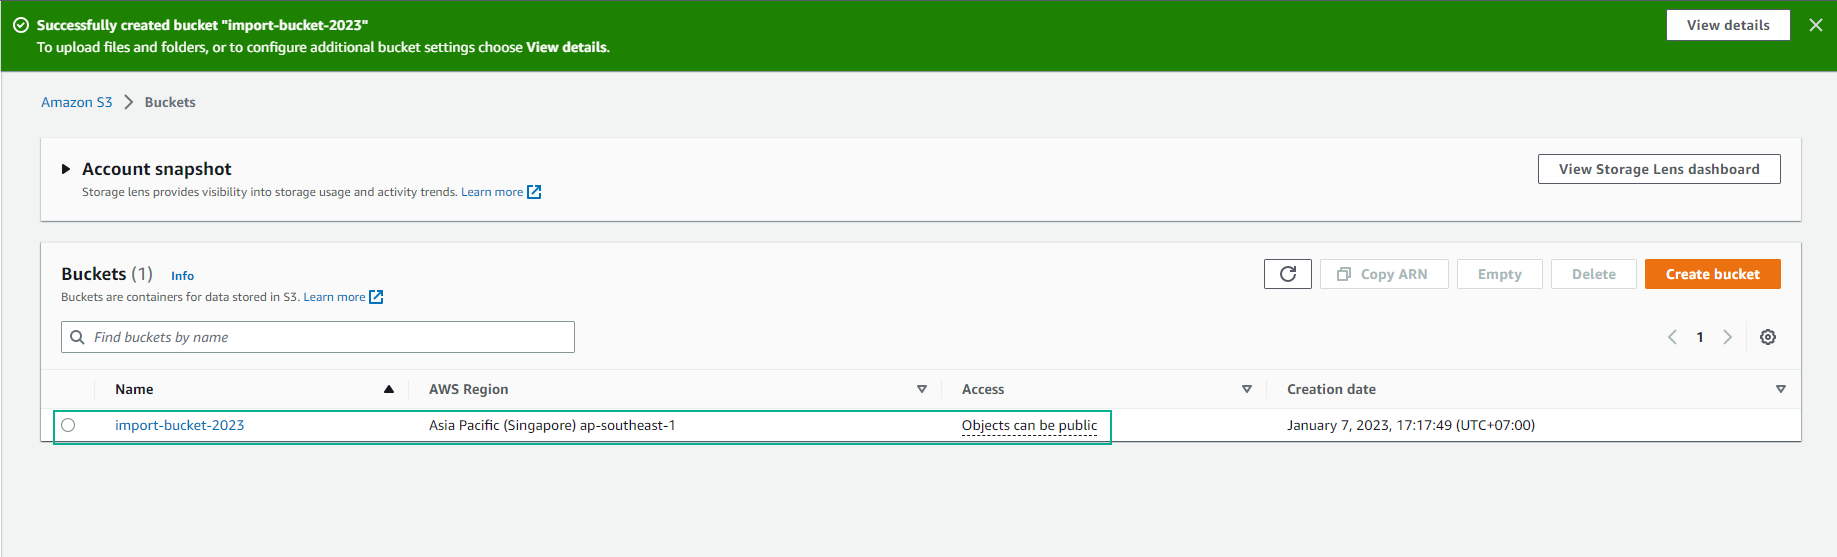
You will see a confirmation message indicating successful bucket creation.
Upload Virtual Machine to S3 Bucket
-
After creating the bucket, proceed to upload the virtual machine file exported in the previous section:
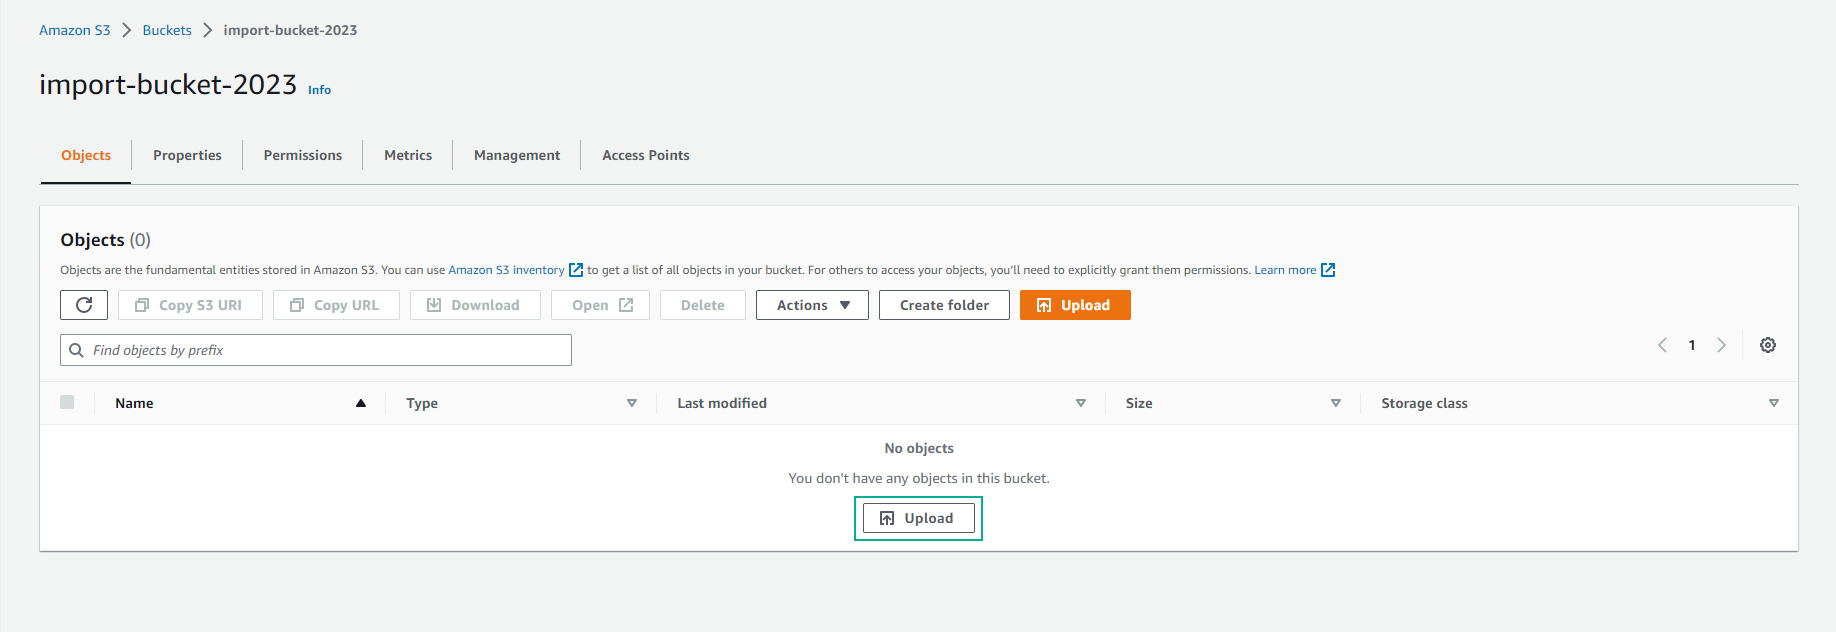
- Access the S3 bucket you created (e.g., import-bucket-2023).
- In the Objects section, click on Upload.
-
Drag and drop the exported virtual machine file from the on-prem virtualization environment into the window, or select Add files to choose the virtual machine file. Then click on Upload. For example, if you created a virtual machine using VMWare Workstation, the virtual machine file might be named
Ubuntu-disk1.vmdk.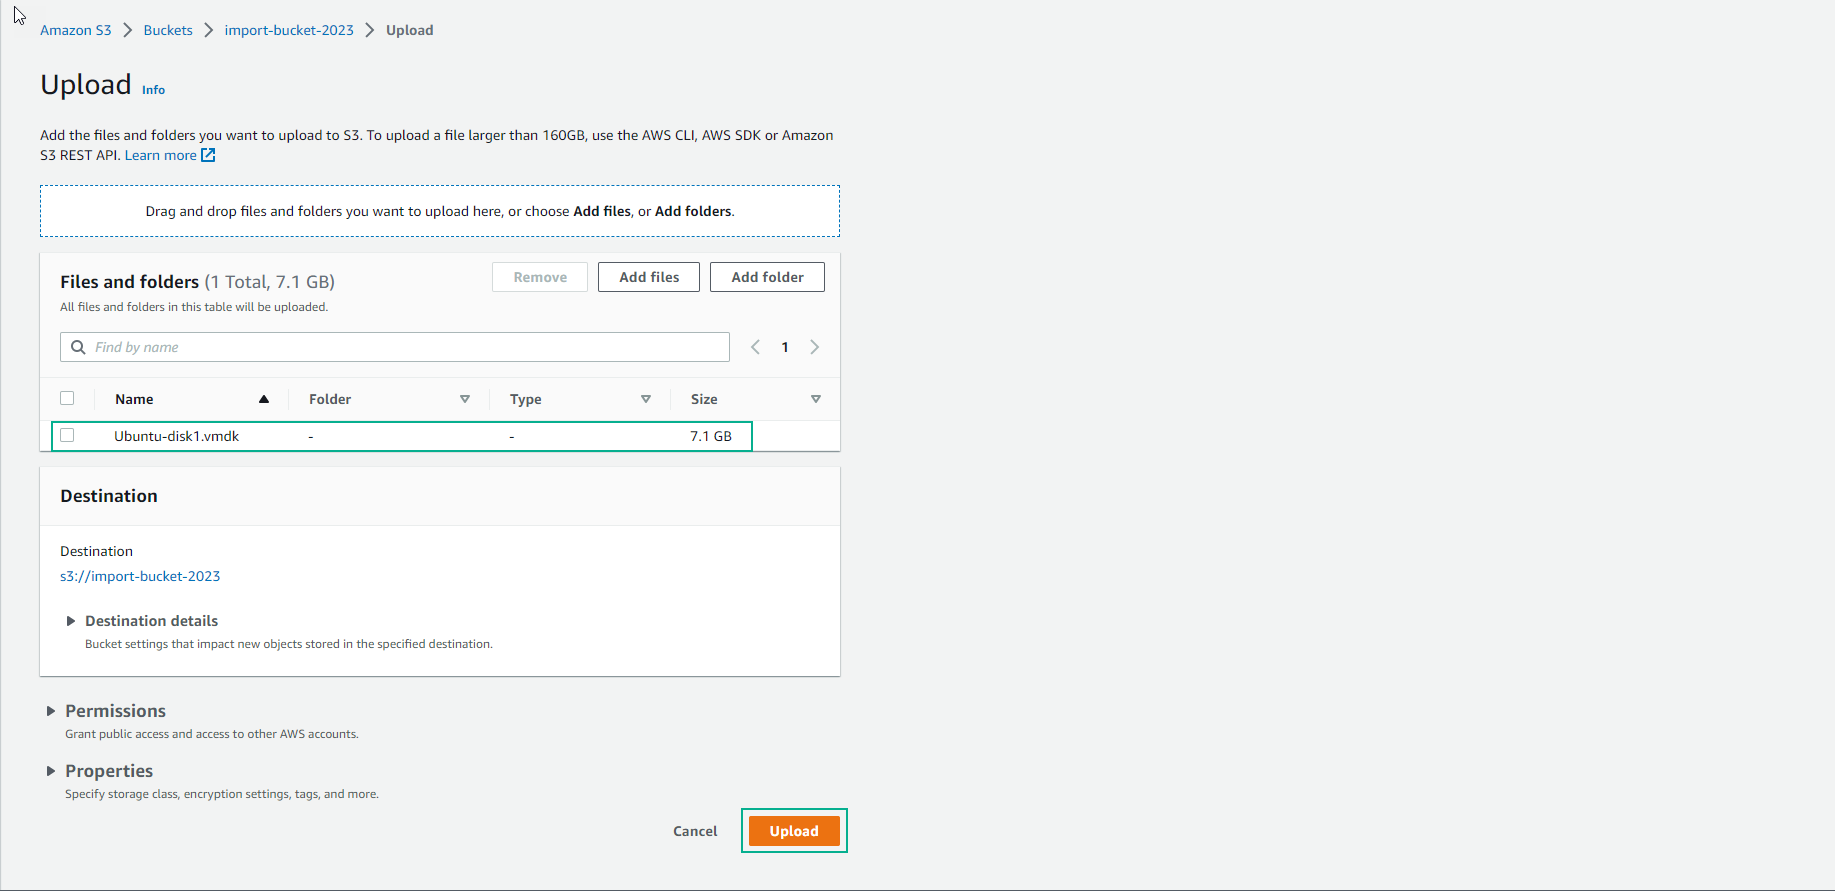
-
It may take some time for the file to be uploaded to the S3 bucket.
